Docs Using Nota
History
Every dictation is kept on your Mac. Search it, replay it, export it, or clean it up.
Open History in the sidebar. Dictations are grouped by day, newest first. Files you transcribe land here too.
Find a dictation
- Type in the search field (⌘F). It searches both the original and the cleaned-up text, and highlights matches.
- Use the filter to show All, Enhanced, Raw only, With audio, or one mode.
Open a dictation
Click a row to expand it. You see the original text and, if it was rewritten, the new version next to it. If the recording was kept, a player lets you listen at 1×, 1.5× or 2×.
- Copy copies the final text. Copy Raw copies the original.
- Retranscribe runs the recording again, for example with a better model.
- Rewrite runs the mode's rewrite again.
- Edit fixes the text. Add to Dictionary saves a word from it.
- Show in Finder shows the audio file.
Info
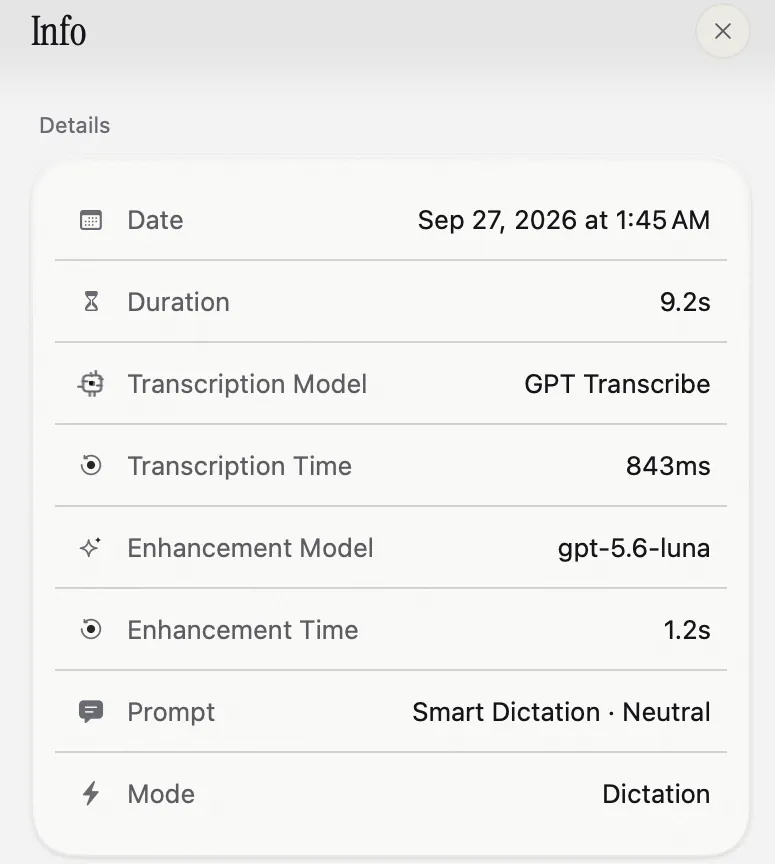
Click Info on an expanded row to see how the text was made: date, length, the speech model and how long it took, the rewrite model and its time, the style or prompt, and the mode. Below that you see the exact request that was sent for the rewrite, so nothing is hidden.
For tracked requests, History can also show where the speech or AI processing was sent and masking information. See Privacy controls. Long Notebook notes use their own library, rather than these History rows.
Delete and undo
Select one or more rows and press Delete. A notice lets you Undo (or press ⌘Z) for 6 seconds. After that, the text and the audio are removed.
Export
- Select the dictations you want (⌘A selects all).
- Choose export in the toolbar and pick a format: Markdown (grouped by day), Plain text, or CSV (time, length, mode, original and final text).
Clean up automatically
Click the gear button on the History page.
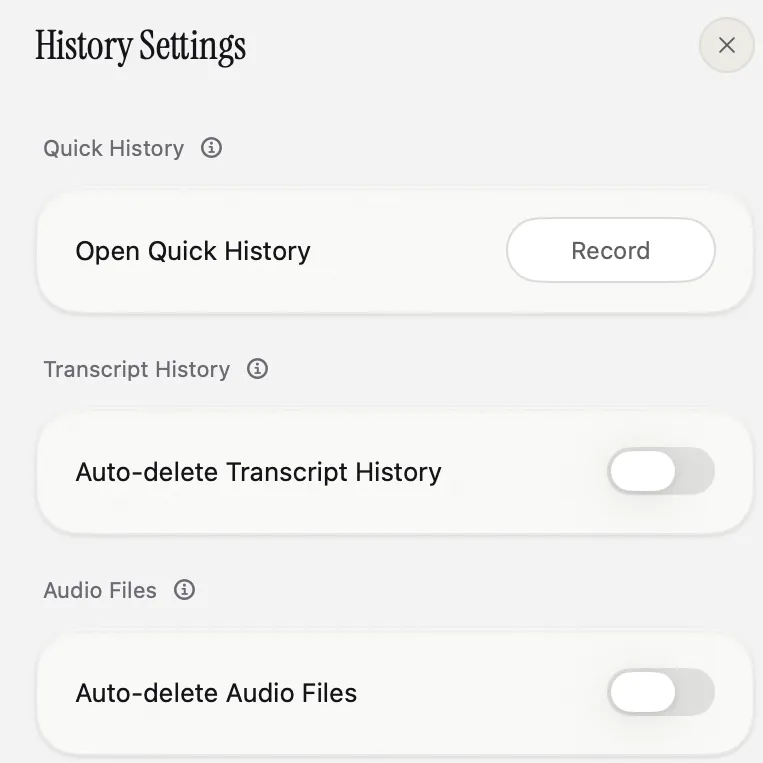
- Auto-delete Transcript History removes dictations after a set time: right away, 1 hour, 1 day, 3 days or 7 days.
- Auto-delete Audio Files keeps the text but removes recordings after 1, 3, 7, 14 or 30 days.
- Run Cleanup Now shows how many files and how much space it will free, and asks first.
Both are off by default: Nota keeps everything until you decide.
Quick History
Quick History is a small search panel over any app. Open it with ⇧⌘H from the menu bar, or with your own shortcut (set it in History settings). Use the arrow keys to pick a dictation and press Return to paste it where you were typing. Esc closes it.